Node Types
1. Input Node�
The Input Node is the starting point of every Tool Flow. It defines how data enters the workflow and acts as the gateway for all subsequent logic. Without an Input Node, the tool cannot begin processing.
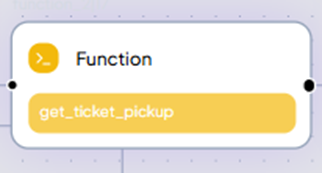
2. Function Node
The Function Node enhances your automation flow by allowing you to write and execute custom Python code directly within the interface. This provides deeper control over data handling and business logic beyond what preset nodes offer.
Key Capabilities
- Dynamic Data Processing: Transform, filter, or enrich data as it moves through your flow.
- Reusable Logic: Import and use predefined functions from your organization’s script library.
Common Use Cases
- Data Transformation: Convert data formats, restructure JSON, or normalize inputs.
- Business Logic: Apply validation rules, perform calculations, or make conditional decisions.
- Text Manipulation: Use regex or string operations.
- Mathematical Operations: Perform calculations or statistical evaluations.
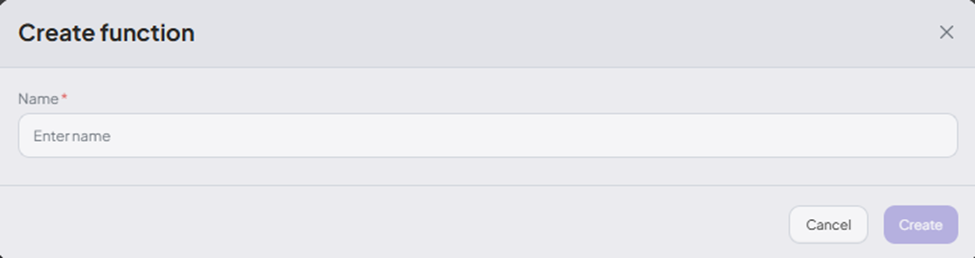
How to Create a Function Node
- In Studio, switch to the Function tab.
- Click Add Function to insert a Function Node into your flow.
-
Define your custom function:
- Specify input and output variables.
- Write your logic in Python within the code editor.
For example
def get_weekend_info(dt: datetime.datetime):
    """
    Return a dictionary containing the date and day name
    if the given date is Saturday or Sunday. Otherwise, return an empty dict.
    """
    weekday = dt.weekday()
    if weekday == 5:
        return {"date": dt.date().isoformat(), "day": "Saturday"}
    elif weekday == 6:
        return {"date": dt.date().isoformat(), "day": "Sunday"}
    return {}

start = datetime.datetime.fromisoformat(context["start_leave_datetime"])
end = datetime.datetime.fromisoformat(context["end_leave_datetime"])

# Only add to result if get_weekend_info returns a non-empty dictionary
result = []

for dt in [start, end]:
    info = get_weekend_info(dt)
    if info:
        result.append(info)
You can access the context object, which stores parameters extracted from the tool input or from previous nodes.
start = datetime.datetime.fromisoformat(context["start_leave_datetime"])
end = datetime.datetime.fromisoformat(context["end_leave_datetime"])
Note: Always assign the final output of your function to the variable
result.
✅ Supported Built-in Functions and Types
You can use the following Python built-ins safely:
int()– convert to integerstr()– convert to stringlen()– get the length of a list/string/etc.range()– create a range of numbersfloat()– convert to floatprint()– output text to console/logException– base exception classmax()– get the maximum of iterable or argumentsmin()– get the minimum of iterable or argumentsround()– round a numbersorted()– sort an iterable__import__()– allow module import (used by Python internally)
✅ Supported External Modules
random– Python’s built-in random module (e.g.,random.randint())datetime– for handling dates and times (e.g.,datetime.datetime.now())pandas(aspd) – powerful data analysis library (e.g.,pd.DataFrame())uuid– for generating UUIDs (e.g.,uuid.uuid4())
Add and Configure a Function Node
- Select the function you want to execute.
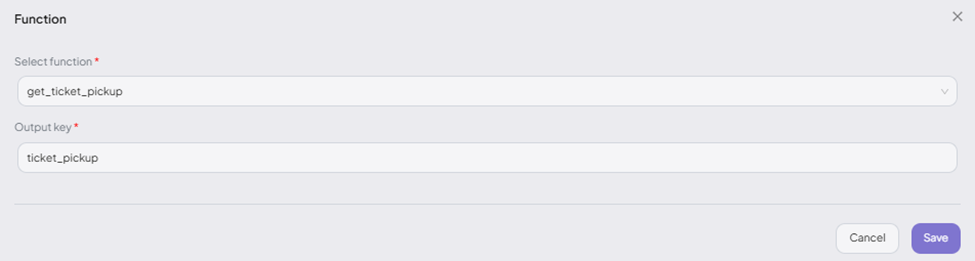
- Define an Output Key to store the function’s result in the context for use by other nodes.
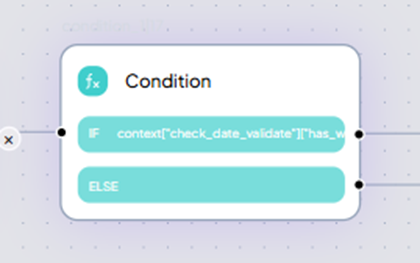
3. Condition Node
Condition Nodes enable branching within a workflow by directing the flow based on conditions.
Supported Condition Types
- If: Executes the branch when specified criteria (Node, Context, or Value) are met.
- Else If: Defines alternate criteria when the initial
Ifis not satisfied. - Else: Handles all other cases when no condition is met.
How to Configure a Condition Node
- Insert the Condition Node at the appropriate point in the flow.
- Set the condition using variables or node outputs.
For complex logic, enable "Use text" and define custom expressions using logical operators:
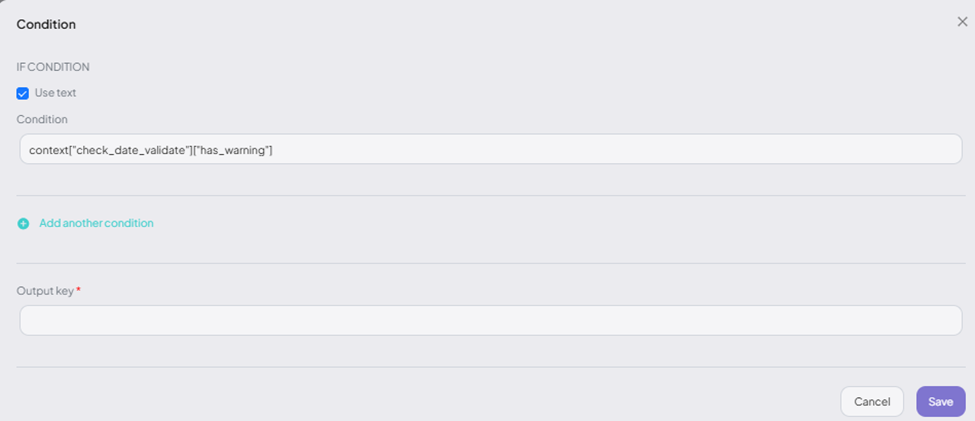
For example
context['parameters'].get('age') > 18 and context['parameters'].get('status') == 'active'
4. API Node
API Nodes allow you to connect with external systems and retrieve or send data via REST APIs.
How to Create an API Node
- In Studio, switch to the API tab.
- Click Add API to define an API Node in your flow.
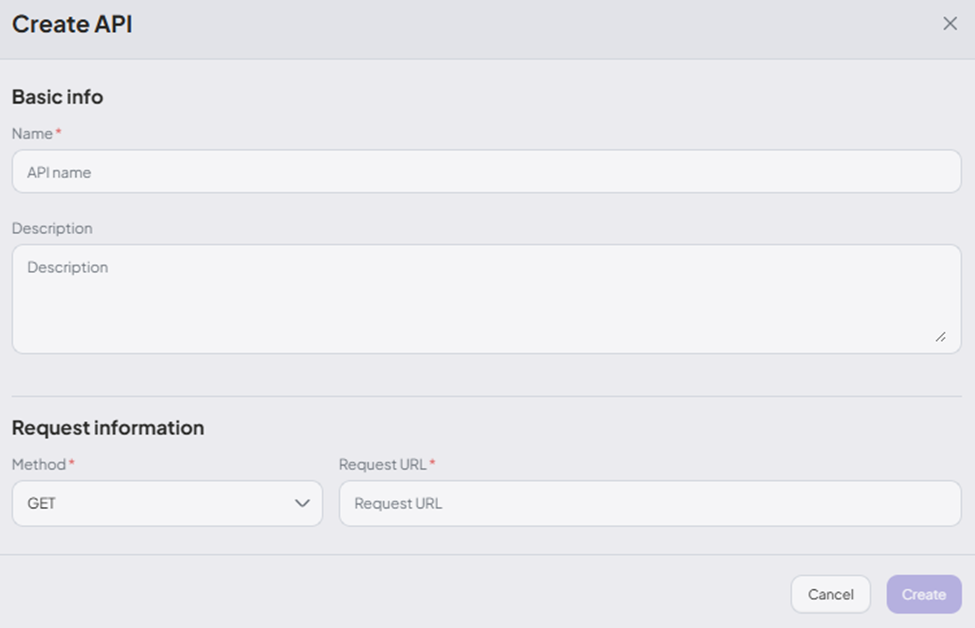
Configure parameters, headers, and body fields as required by the API.
Example – Body:
{
  "dates": {{{context['parameters'].get('dates', [])}}}
}
Advanced Configuration
- Use the Pre-request Script to modify the request dynamically before sending.
Example – Pre-request:
dx['headers']['Authorization'] = 'Bearer ' + dx['parameters']['token']
- Use the Post-response Script to transform the API response.
Example – Post-response:
res = dx["response"]["data"]
headers = dx["headers"]["search"].replace("true", "True").replace("false", "False").replace("null", "None")

try:
    headers = eval(headers)

    # Filter salons by city ID
    res = [x for x in res if x["cityId"] == headers["city_id"]]

    # Approximate distance function (squared Euclidean)
    def distance(a, b, x, y):
        return (x - a) ** 2 + (y - b) ** 2

    # Sort salons by distance
    res.sort(key=lambda x: distance(headers["lat"], headers["lon"], x["latitude"], x["longitude"]))

    if not res:
        dx["response"] = "No nearby salons found in your area."
    else:
        dx["response"] = "Salon List\n" + "\n".join(f"- **{x['addressNew']}**" for x in res[:5])

except Exception as e:
    print("Error parsing headers:", e)
Add and Configure an API Node
- Select the API from your predefined list.
- Define error status codes (e.g., 400, 401) to handle specific failure branches.
- Specify an Output Key to store the response in the context for use in later nodes.
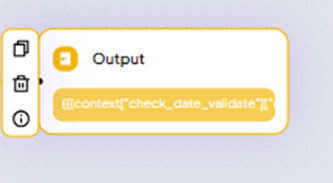
5. Output Node
Output Nodes define what result is returned from the Tool Flow, either on success or failure.
Add and Configure an Output Node
- Insert the Output Node at the final step in your Tool Flow.
- Configure the output to return processed data or display an error message.
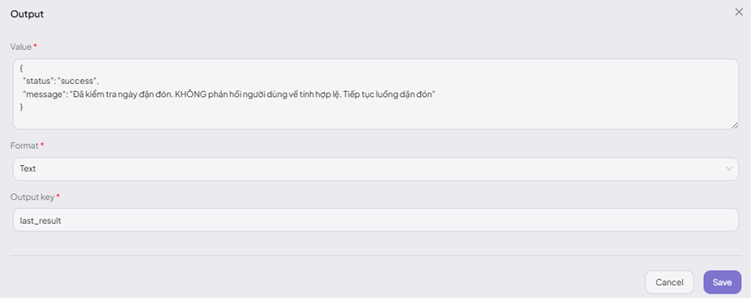
The Output Node passes data back to the agent, which then uses it to generate a response for the user.